Wednesday, October 31, 2012

Halloween Kiddies

Pin It
I love Halloween because I get to dress up my kids and there's something about a little face paint and a costume that makes your kids that much cuter.

My daughter was Minnie Mouse and my son was Charlie Brown.
She was SO fun to take trick-or-treating.


 My daughter's best friend was also Minnie Mouse.  How fun!

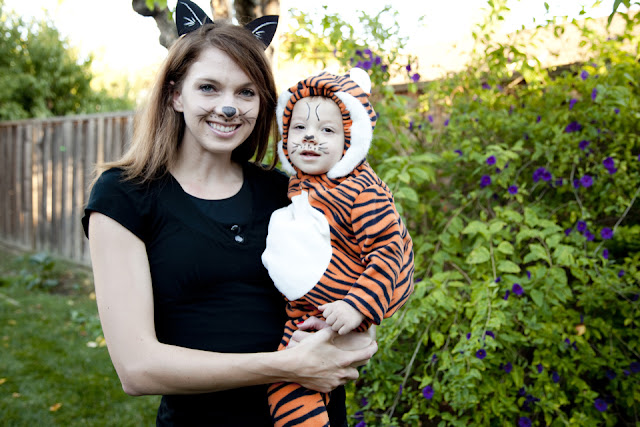
I thought it would be fun to post pictures of your adorable kids all dressed up.  Here are the photos that were submitted pictures.  Seriously, how cute are these photos???

The 3 Amigos


Luke, Leia and an Ewok


A Metro Card - From NYC.  She made this using the freezer paper stencil technique.  Wishing them well as they try to recover from Hurricane Sandy.
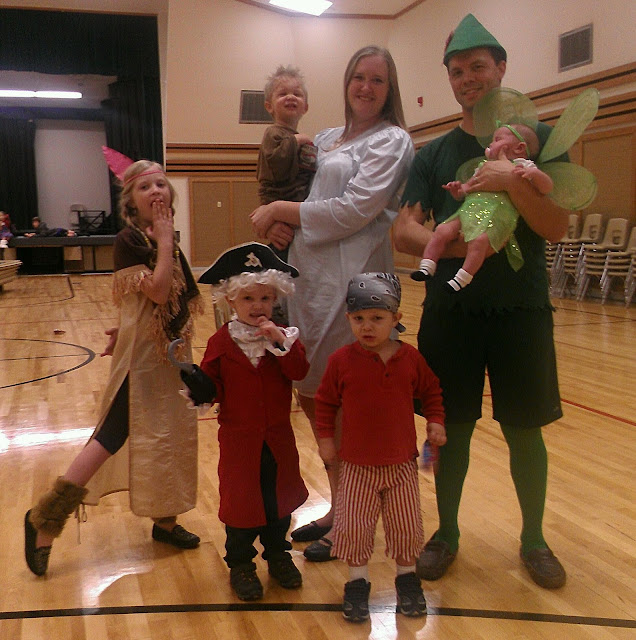
The whole Peter Pan Crew.  So cute!


Ken, Barbie, Woodie and Buzz - So fun!


Tuesday, October 30, 2012

Minnie Mouse Headband Tutorial

Pin It

My daughter is going to be Minnie Mouse for Halloween.  Today I made her a headband with the minnie mouse ears and bow.  I LOVE seeing my kids all dressed up for Halloween!  Here's the template.  Let me know if you have any questions!

First use the template above and cut out two ear pieces out of black felt.
Cut four circles out of foam.
Hot glue two of the foam circles together and then glue them to the ear piece.  
Seal up the edges with hot glue but leave the bottom "rectangle" area open so you can slide the ears onto the headband.
Attach the ears to your headband.  I bought a pack of headbands at the dollar store.  
 Next for the bow.  Cut a rectangle that is 8"x12" and another small one that is 1.5"x4"
 You'll follow these same instructions for both rectangles.  First put right sides together and sew straight down.  I used a 1/4" seam for the large rectangle and a 1/8" seam for the small one.
 Flip right-side out.
 For the smaller rectangle, you'll probably need a safety pin to help turn it right-side out.
Fold the ends in.
 Put right sides together (the first seam should be centered in the back rather than on the top of or the bottom of the loop.  If that doesn't make sense, just look at the picture below)  Sew the two edges together.
 Flip back right-side out again and have the seam centered in the back.
 Fold the bow like an accordion and hot glue in place so it looks like a little bow.  Then place your small loop center piece by sliding it over the bow until it's in the middle.  Glue it in place.  Then all you have to do is add your bow to the headband.  Wa-la!


Monday, October 29, 2012

Wish I'd Known: Clean Enough....

Pin It
Lately my house has become a total disaster.  I've been really busy with photography.  So much so that I often don't feel like I have a minute to do anything BUT take pictures/edit.  I came upon a quote that I really want to take to heart:

"Have your house clean enough to be healthy, messy enough to be happy.  Clean enough to be sanitary, messy enough to be sane."  

Honestly I have felt completely overwhelmed with everything I need to get done.  I feel like I'm failing a bit as a mother/wife because my house isn't clean.  Well my new standard isn't going to be that my house must be 100% spotless all the time, because let's be honest....that just doesn't happen with kids.  At least it doesn't happen for me.  So rather than constantly feeling like I'm failing, I'm going to work a little harder on making my house clean enough to be healthy, but messy enough for me to still be happy.

Sunday, October 28, 2012

Mommy Moment: Hi Jesus!

Pin It
The other day when I was shopping at Hobby Lobby, my daughter saw a large nativity display.  She yelled as loud as she possible could "Hi Jesus!!!"  We got a few interesting looks from some of the other shoppers.

Saturday, October 27, 2012

Cardboard and Popsicle Stick Haunted House

Pin It
Our apartment complex had a window decorating contest for a $75 prize.  You better believe I was crazy and spent way too much time on decorating my window.  Our maintenance guy was the judge so I knew he wasn't going to vote for something cutesy.  So I tried do make something cool/unique.  Unfortunately, my weeks worth of work wasn't enough to win the grand prize, BUT I was runner up and got $25.  The winner did an illusion that reflected a computer screen off of plexiglass to make it look like a ghost was walking around.  If you ever decide to get crazy and make a haunted house - here's a tutorial for you.

I used a bisquick box, but you could use a cereal box or something like that.
 Carefully take apart the seams of your box and lay it flat.
 Next draw a line across your box and score it with your scissors so it will be easier to bend.  This will be where your house stops and the roof starts.  Make sure that sides of your roof are long enough to reach each other. Then cut the folds (where I've drawn the red lines) down the the line.  Also the little tiny flay on the side can be cut off to the line as well. 
Okay.....now my husband wanted me to do a house that was skinner at the base than the top.  If you don't really care, I would not do it because it made it much more work in the long run.  But if you do want it that way, look at the picture below to see what I did.
 Fold the house back up and hot glue it in place.  Make sure to glue this little tab inside. 
 Seal the base with hot glue as well.
 This is what your house should look like at this point.
 Open up your flaps on the top.
 Glue your roof pieces together,
 Then trace the triangle to onto the other flaps and gut then out.  Then glue those in place.
 I added a chimney to mine.  This is what the piece for the chimney looked like.
 Then I started cutting up popsicle sticks.  Warning, this will ruin your scissors and your hands haha.
 Because the house was slanted this part was more time consuming because I had to cut the popsicles sticks at the right angle.  I made sure to over lap the popsicle sticks a bit and also ad in some inconsistencies to make it more spooky.  
 I added a crack to the house because the popsicle sticks weren't long enough to fit all the way across and I thought a crack would be cooler than just staggering lines like bricks.
 I used the popsicle stick ends for the roofing.
 Next I painted the house gray with black roofing.
 I then came back and added some distressing to make the house look nice and haunted by using a darker color of paint and wiping/blotching it off with a paper towel.  I also added a door, which was a piece of cereal box that I painted.
 Lastly I put it in my window with the hanging shrunken apple heads.  I added some dead shrubs, dirt and a wood-chip path to make the whole thing come together.
 My husband likes this shot because he thinks the reflection looks cool.  So I decided to post it as well.
If you end up making one, I'd love to see it!