Sunday, September 30, 2012

Wish I'd Known: Saving Time & Money on Ground Beef

Pin It
This is my own tip for you moms.  

Cook one package of ground beef and divide it into three meals.

I personally don't love a ton of ground beef in my meals.  When a recipe calls for 1 lb, I usually only do half of that.  I don't know why, but it's just not my fave.  Which is really strange since hamburgers are pretty much my favorite food.  Anyways....a way I stretch the buck, is to cook 1 package of hamburger (usually like 1.3 pounds) and break it into 3 meals.  I will use one third for something like spaghetti, then another for taco salads and the last one for stroganoff or something like that.  It also makes the second and third meal super easy and fast.  This obviously wouldn't work for a large family, but it works for our small family.  My husband never complains that there isn't enough meat in our meals, so I don't think he even notices.

Saturday, September 29, 2012

ABC Handprint Art Part 2

Pin It
Here is part two of the alphabet handprint art.


Friday, September 28, 2012

Mommy Moment: Girls are different

Pin It
Today's Mommy Moment is from Jennifer:

I was changing my daughter's diaper and my 2 year old nephew (who has 2 brothers and no sisters) was in the room.  I took off my daughter's diaper and my nephew looked confused and said, "a bum?" Ha ha!

Thursday, September 27, 2012

ABC Handprint Art Part 1

Pin It
I thought it would be fun to do some handprint art with my daughter.  Then I got to thinking how many different things we could make out of a handprint, so I decided to do a painting for each letter of the alphabet.  Here are the first 5 paintings.  Sorry for the bad pictures - my scanner isn't the best.


Wednesday, September 26, 2012

Wish I'd Known: Candy-less Potty Training

Pin It
Today's tip is about potty training.

Don't give candy as a reward for potty training - Nia

Nia, I totally 100% agree with you!  When I potty trained my daughter, I was trying to figure out what I would do as a reward.  I knew several people who gave candy, but I didn't really want my daughter eating a ton of candy.  I decided to use stickers.  I put a piece of paper on the wall that said "I Went Potty".  Then each time she went to the bathroom she got to put stickers on the paper.  She would get one sticker for pee-pee and two stickers for poo-poo.  She loved getting to pick out her stickers.

The first day couple of days of potty training consisted of several trips to the bathroom with a ton of little successes.  IfI had been giving her candy as a reward, my daughter would have been in a sugar coma!

Unfortunately, we went on a trip to Georgia and through wearing pull-ups in the car rides, her potty training regressed a bit so I had to re-potty train her.  I wasn't totally starting from scratch, but you get the idea.  I wanted to do a different reward this time, but still avoid the candy.  What I ended up doing was hanging a paper on the fridge and each time she went to the bathroom she could come and draw a smiley face.  No, they didn't really look like faces, but she LOVED it!  Then every day my husband would get back from work she could show him all of her faces.

I started thinking that the whole drawing faces thing could be used as a learning opportunity.  Instead of drawing faces, your child could trace a letter of the alphabet or draw a certain shape.  They are learning while getting their reward!

Potty training can be hard.  Let us know if you have any other tips for moms out there!

Tuesday, September 25, 2012

Paper Plate Flower

Pin It
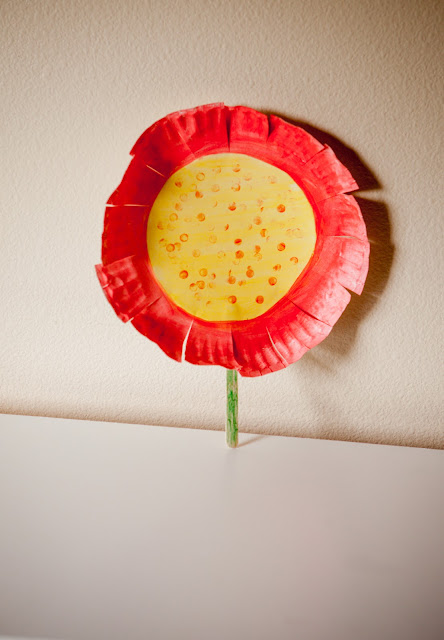
My daughter really enjoyed adding the dots to the center of the flower.  We used the back of a pencil.  She dipped the eraser into the paint and then pounded away on the plate.  


Monday, September 24, 2012

Mommy Moment: Runaway Cart

Pin It
Today's mommy moment is from Heidi.

It was Monday morning, and I was feeling a little anxious as I headed to the grocery store. This was my first trip outside the home with both kids. Lexi was only 2 weeks old. I had meticulously planned my grocery list. Everything was perfectly in order to maximize my efforts to get in and out of the store as quickly as possible. I hopped out of the car and got both girls out. I got into the store and to my dismay, there were no shopping carts with the toy car on it. So I grabbed a regular shopping cart and stuck Abby in the child’s seat, and Lexi (in her car seat) on the middle part of the cart. No big deal. I can do this. I quickly made my rounds in the store, and before I knew it I was almost done. Besides a few tears, this had been a pretty uneventful trip. I checked out, and as I was walking out to the car I thought “Wow, that wasn’t so bad! I did it!”. I pushed the shopping cart to my car, and started piling my groceries into the back of the car. Next I pushed the cart over to the side of the car and started to put Lexi in. I heard the “click” of the carseat, letting me know she was in. Before I turned around, I heard a lady shout “Um, MAAM!? MAAM!!!!!!!!!!!!!!!!!!”.  “What in the world is this lady doing?” I thought as I proceeded to turn around. As I began to turn in her direction, something caught my eye. A shopping cart, moving pretty quickly, and already at the end of the parking lot….. WAIT…. MY SHOPPING CART, MOVING PRETTY QUICKLY AND ALREADY AT THE END OF THE PARKING LOT…………. WITH MY 2 YEAR OLD IN IT! I could hear her laughing and squealing “WEEEEEEEEEEEEEEEEEEEEE! WEEEEEEEEEEEEEEEEE!” and kicking her legs harder and harder in excitement. But the harder she kicked those little legs, the faster she went. “OH MY GOSH” was all I could stammer as I took off in an Olympic sprint. She was heading into the next parking lot, RC Willey’s Furniture, when the Mail Man took action. He had seen this all happening from afar. He revved up that mail carrier and zoomed over to save my squealing toddler. But he wasn’t fast enough. I got there first, and pulled the getaway cart to a halt. Abby shrieked in delight “FUNNY MOMMY!”. I caught my breath and turned to the mail man who asked if everything was ok. I assured him we were fine, then turned my cart around to continue my walk of shame to the car. The lady that yelled at me was laughing to the point of tears, and couldn’t get over the way that Abby pumped her legs to get the cart going faster and faster. I managed to chuckle a little through my embarrassment and thanked her for her help. “This is my first time out with both kids” I mumbled. She reassured me that things like this happen, and it could have been much worse. I got into the car, cheeks bright red, heart still racing, and thought “Chalk one up for Abby. Kids: 1 Mom: 0”. I almost made it. 7 months later, and our trips to the grocery store are much more successful these days. Practice makes perfect people.

Sunday, September 23, 2012

Snake Blower

Pin It

Supplies:
Toilet paper roll
Red party streamer
White card stock
Paint
Marker
Scissors
Glue
Tape

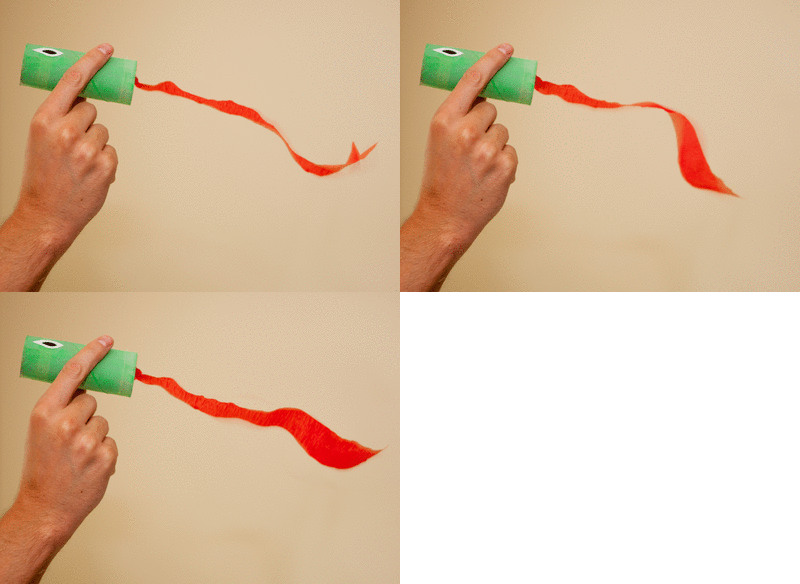
The first thing you need to do to make your snake blower is to paint a toilet paper roll....or if you have green paper, you could just make a tube out of that.
 Then attach your red streamer to the inside of your tube, you want it taped to the top about 1/3 the way in.  Then attach your teeth.  I would recommend using card stock fir your teeth if possible.  I didn't have white cardstock on hand, so I just used normal printer paper.
Add your eyes to the side of the tube and you're done!
 Have your child blow into the tube and the streamer will move just like a snake's tongue.


Saturday, September 22, 2012

Wish I'd Known: Extras

Pin It
Today's wish I'd known tip is from Antonio, a dad of two beautiful girls.  He said dads can give advice too and he's right :) His tip is to:

Have extras in your car

Don't forget to put some diapers and wipes in the car just in case you forget (or feel too manly) to pack a diaper bag.  It saves an emergency trip to the nearest Walmart (which has happened to me many times).  Also have an extra change of clothes in there. - Antonio

This is such a great tip!  Seriously, how many times have you forgotten your diaper bag or used all of the diapers/clothes in your bag?  Thanks Antonio for the great advise!

Friday, September 21, 2012

Tissue Paper Butterflies

Pin It
My daughter loved making these fly around the house and when they ended up getting ruined (that will happen with something made out of tissue paper) I just took the pipe cleaners and put them back in my craft closet.  There were SO easy to make.  I cut two squares of tissue paper  about 5"x5" and then cut them a bit to make them shaped like butterfly wings.  Then take one pipe cleaner, fold it in half and twist the bottom a little.  Add the tissue paper and then twist the top of the pipe cleaners at the top and then make some little antenas with the two ends up your pipe cleaner.


Thursday, September 20, 2012

Hello Fab Giveaway Winner

Pin It
The winner of the Hello Fab giveaway is........Alysha!

Congrats Alysha!  Thanks to everyone who participated and a special thanks to Hello Fab.

Wednesday, September 19, 2012

Free Krispy Kreme Donuts Today!!

Pin It
In case you hadn't heard, it's talk like a pirate day and if you dress up like a pirate (or dress your kid up like a pirate) you get a dozen glazed donuts for FREE today at Krispy Kreme.  You get a dozen for each person dressed up so you could get a ridiculous amount of donuts for your family if you really wanted.  If you just go in and talk like a pirate, you get one free donut.  Go HERE for more info.  You're welcome :)


ARRRRRGH!

Not Quite Beautiful...

Pin It
While potty training my daughter, I would obviously get really excited when she went to the bathroom in the toilet and so did she.  One time after she went poo-poo, she got off the toilet, checked out her accomplishment and exclaimed, "Ohhhhh BEAUTIFUL!!!"

Tuesday, September 18, 2012

Clip-on Bow Tie Tutorial

Pin It

I love bow ties on little boys.  The nice thing about bow ties is that they are really easy to make.  You pretty much just need to know how to sew in a straight line and fold things in half.  

Cut two rectangles out of your fabric.  One rectangle should be 4.5"x8" and the other should be 1.5"x3"

** The measurements above are for a small bow tie that a baby or toddler would wear.  For a larger sized bow tie, your rectangles should be should be 6"x11" and 2"x4"**
 Take your large rectangle and fold it in half - right sides together.  Sew together with a 1/4" seam allowance.
 Flip right-side out and iron (with the seam in the center, rather than on the edge).
Tuck in the edges a little bit (technically you don't need to do this, I just think it looks nicer if you do).
Put right sides together (with the seam showing on the outside) and sew a 1/4" seam allowance. 
Flip right-side out.  Iron with the seam centered - this will be the back of your bow tie.
 You'll now follow the same steps with your small rectangle.  Sew right sides together and do a 1/4" seam allowance.
 Flip inside out - this can be challenging since it's so small, I would recommend using a safety pin to help you out.
Iron the fabric with the seam in the center. 
 Tuck in the edges.
I used scissors to help with this part.  
Then sew the edges together with the seam side facing out - I used an 1/8" seam allowance here.  Once again you'll turn it right-side out.
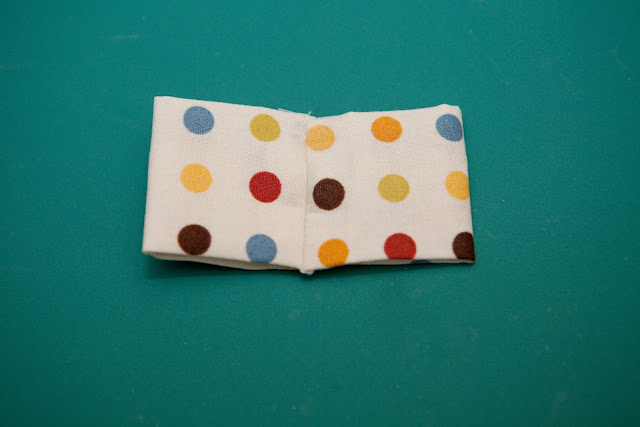
 Now for getting the bow tie to take shape. To fold it you want to make it like an "m" first with the middle scrunching in and then folding the edges towards the back again.
 To keep it in place, you have the choice to either hand sew it with a needle and thread or you can use hot glue.  Honestly hot glue is the easiest since there are so many layers to go through with the needle.
  Go back to the small circle (the middle piece) and use a seam ripper to tear a little hole.
Want to know the secret behind the clip-on part?  It's a clip used for clip-on earrings. I found a pack of 12 for $3 (but then also used my 40% coupon so it was an even better deal) Hobby Lobby.  I'm sure you could similar ones at other craft stores.
Push the clip through the hole.  If you want to put something on your open seam to keep it from fraying, you can use fabric glue or clear fingernail polish.
Secure the metal circle part to the fabric using hot glue.
 Thread the large tie part through your middle circle and secure the metal circle to the tie once again using hot glue.  
 You're done!!!
 Now go make lots!


**I've had a few people ask me if the clip bothers the person wearing the tie.  My son isn't old enough to tell me it's bothering him, but he doesn't seem to notice.  If you want to cover the clip, I would recommend a small piece of felt.**

Monday, September 17, 2012

Walk the Line

Pin It
 Talk about an easy activity!  All you do is put tape on your carpet and then use a couple different markers to draw on the lines.  When she got sick of walking on the lines, she made Nemo swim on them.