I love bow ties on little boys. The nice thing about bow ties is that they are really easy to make. You pretty much just need to know how to sew in a straight line and fold things in half.
Cut two rectangles out of your fabric. One rectangle should be 4.5"x8" and the other should be 1.5"x3"
** The measurements above are for a small bow tie that a baby or toddler would wear. For a larger sized bow tie, your rectangles should be should be 6"x11" and 2"x4"**
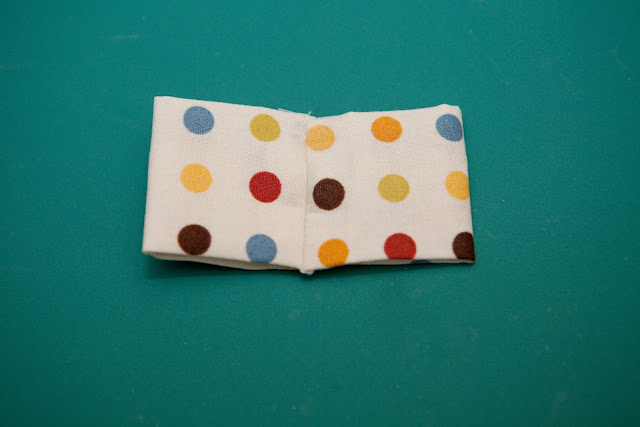
Take your large rectangle and fold it in half - right sides together. Sew together with a 1/4" seam allowance.
Flip right-side out and iron (with the seam in the center, rather than on the edge).
Tuck in the edges a little bit (technically you don't need to do this, I just think it looks nicer if you do).
Put right sides together (with the seam showing on the outside) and sew a 1/4" seam allowance.
Flip right-side out. Iron with the seam centered - this will be the back of your bow tie.
You'll now follow the same steps with your small rectangle. Sew right sides together and do a 1/4" seam allowance.
Flip inside out - this can be challenging since it's so small, I would recommend using a safety pin to help you out.
Iron the fabric with the seam in the center.
Tuck in the edges.
I used scissors to help with this part.
Then sew the edges together with the seam side facing out - I used an 1/8" seam allowance here. Once again you'll turn it right-side out.
Now for getting the bow tie to take shape. To fold it you want to make it like an "m" first with the middle scrunching in and then folding the edges towards the back again.
To keep it in place, you have the choice to either hand sew it with a needle and thread or you can use hot glue. Honestly hot glue is the easiest since there are so many layers to go through with the needle.
Go back to the small circle (the middle piece) and use a seam ripper to tear a little hole.
Want to know the secret behind the clip-on part? It's a clip used for clip-on earrings. I found a pack of 12 for $3 (but then also used my 40% coupon so it was an even better deal) Hobby Lobby. I'm sure you could similar ones at other craft stores.
Push the clip through the hole. If you want to put something on your open seam to keep it from fraying, you can use fabric glue or clear fingernail polish.
Secure the metal circle part to the fabric using hot glue.
Thread the large tie part through your middle circle and secure the metal circle to the tie once again using hot glue.
You're done!!!
Now go make lots!
**I've had a few people ask me if the clip bothers the person wearing the tie. My son isn't old enough to tell me it's bothering him, but he doesn't seem to notice. If you want to cover the clip, I would recommend a small piece of felt.**


10 comments:
i'm so excited to make these for my nephew! cutest thing ever!
I just made these. Super easy! My question: Have you had a problem with the little metal piece, that sticks up from the earring, rubbing the wearer?
-Jessica
Shut the front door! Brilliant! I saw clip on and didn't think it would be so great, but that's awesome! Thanks!!!
Gosh I thought having a baby boy meant I'd never be able to sew any cute kid clothes. This and your tie tutorial are awesome!!! I can't wait to try them out!
Love this!!
Just finished 4 little ties for my son and his cousin (ages 2 and 3). Oh my goodness, the tie completes the whole ringbearer outfit!
Thanks fur the great tutorial!
What is the finished length and width of the beautiful bow ties you made?
I sew men's bow ties and am always asked to make them for little boys. This was very helpful. Thanks for posting.
With adjustment for size, I made one out of Superman fabric for my son to wear at his wedding. Took less than 10 minutes!
Thank you so much for this awesome tutorial! I just made one for my little son and a matching one for my pony tail :)
Post a Comment